If you've ever recorded a vocal that sounds harsh and crunchy, or watched those red lights flash on your audio interface, you've experienced clipping. It's one of those technical terms that can feel intimidating at first, but understanding clipping is crucial for getting professional-sounding recordings.
Key Takeaways:
- Clipping happens when your audio signal is too loud for your system to handle, causing harsh distortion
- Proper gain staging prevents clipping by managing levels at every step of your signal chain
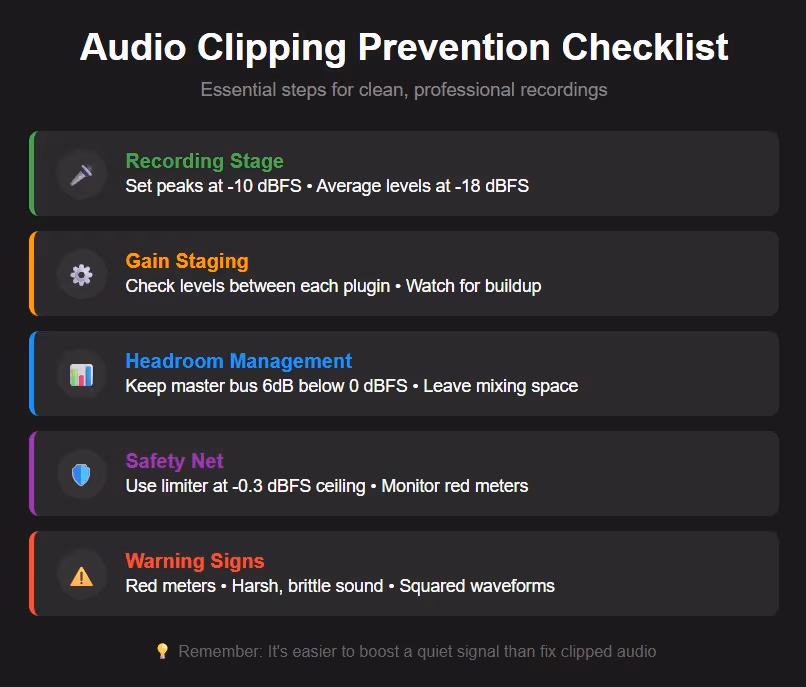
- Aim for peaks around -9 to -10 dBFS and average levels around -18 dBFS when recording
- Digital clipping is destructive and cannot be fixed once it happens
- Using limiters and proper headroom management keeps your music clean and professional
Mastering this concept will transform your sound quality, whether you're recording rap, R&B, or any other genre.
Clipping explained
Clipping is like trying to shove a basketball through a garden hose - the signal is too big for the container, and it gets mangled in the process. When your audio signal exceeds the maximum level your system can handle, the tops of the sound waves get literally "clipped" off, creating a flat, squared-off waveform.
Think of it this way: imagine a person (your audio signal) walking through a doorway. If they're too tall (too much gain), their head gets "clipped" off at the top, creating a flat, distorted shape. That's exactly what happens to your audio when it clips - the peaks get chopped off, turning smooth sine waves into harsh square waves.
In digital audio, this happens at 0 dBFS (decibels Full Scale) - the absolute maximum level your DAW can handle. Unlike analog gear that might add pleasant warmth when pushed hard, digital clipping creates nasty, unusable distortion that ruins recordings.
Why should you avoid clipping?
Clipping ruins your vocal recordings
When your vocals clip, they lose all the natural dynamics and emotion that make them special. Instead of hearing the subtle inflections in your voice, listeners get hit with harsh, brittle distortion that sounds like nails on a chalkboard. Those powerful harmonics in the higher frequencies make your vocals sound sharp, bright, and painfully harsh.
I've seen talented artists waste hours trying to fix clipped vocals in the mix, only to realize that once audio clips during recording, that damage is permanent. No amount of EQ or processing can bring back the information that got chopped off. It's why I'm obsessive about headroom in my own production - the same quality standard that led to songs using my beats being featured at the NBA All-Star Game and performed at the Memphis Hip Hop Awards.
What happens to your beats when they clip?
Clipping doesn't just affect vocals - it destroys the punch and clarity of your instrumentals too. Those hard-hitting 808s you love in trap production? When they clip, they lose their deep, chest-thumping impact and turn into muddy, distorted mush. The crisp hi-hats become harsh and fatiguing to listen to.
Even worse, clipping can actually damage your speakers' tweeters if it's loud enough. Those sharp, high-frequency spikes put serious stress on your equipment, potentially leading to blown speakers and expensive repairs.
Clipping makes mixing almost impossible
Here's something many artists don't realize: clipping creates problems that cascade through your entire production process. When you have clipped audio in your project, every plugin you add afterward is trying to process damaged information. Your compressor can't smooth out dynamics that have already been destroyed. Your EQ can't fix frequencies that have been turned into harsh harmonics.
What does a clipped signal look and sound like?
How can you spot clipping visually?
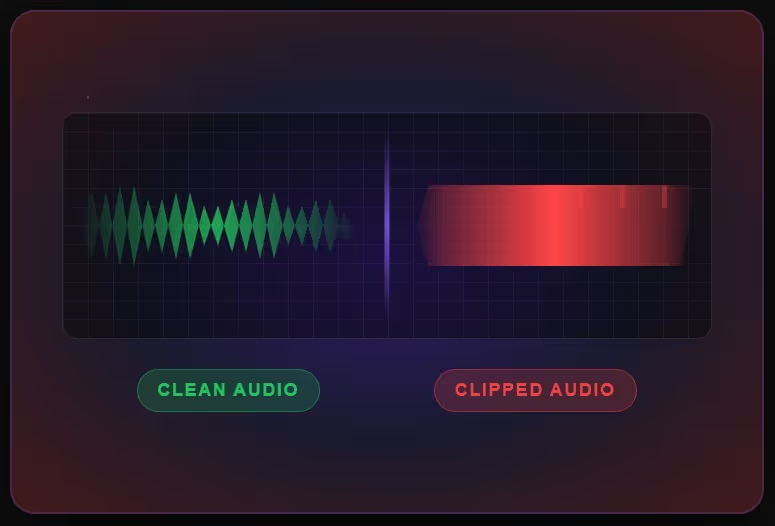
The visual signs of clipping are unmistakable once you know what to look for. In your DAW, watch for these red flags:
Red meters - When your channel or master fader shows red, you're clipping
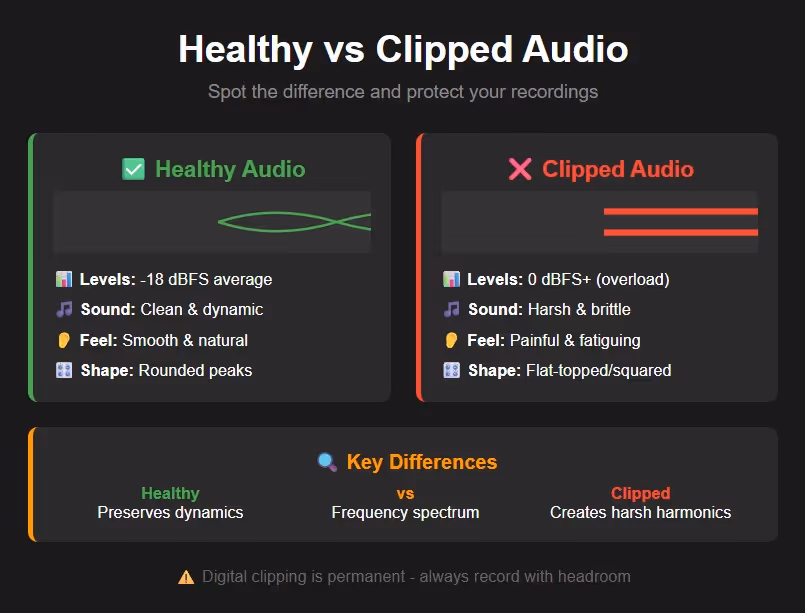
- Squared-off waveforms - Healthy audio has smooth, rounded peaks. Clipped audio looks like someone took a razor and sliced the tops off
- Flat-topped waves - Instead of natural curves, you'll see horizontal lines where the peaks should be
What are the audio characteristics of clipping?
Clipped audio has a distinct sound that's hard to miss:
- Fuzzy and brittle - Like someone added broken glass to your mix
- Harsh and bright - Painful high frequencies that make listeners wince
- Loss of punch - Instead of powerful impacts, everything sounds squashed
- Crackling distortion - Similar to a blown speaker or damaged cable
When I'm checking beats before adding them to my catalog, I can instantly hear if something's been clipped. It's that unmistakable harshness that no amount of mixing can hide.
What's the difference between analog and digital clipping?
Analog clipping can sometimes be desirable
Not all clipping is created equal. Analog clipping - like what happens in vintage gear or guitar amplifiers - can actually sound musical. When analog equipment clips, it gently saturates the audio, creating warm, pleasant harmonics that enhance the original signal. This is why guitarists love cranking tube amps and why some producers use analog saturation plugins.
Analog systems have a more forgiving "ceiling" that allows for gradual compression before hard clipping occurs. This soft clipping rounds off peaks gently, creating harmonic distortion that our ears often perceive as warmth and fullness.
Digital clipping is destructive
Digital clipping is a completely different beast. There's no gradual compression or musical saturation - when you hit 0 dBFS, it's like hitting a brick wall. The waveform gets brutally chopped off, creating harsh harmonics that sound terrible.
Here's the critical difference: analog clipping adds musical harmonics primarily in the mid-range frequencies, while digital clipping creates sharp, unpleasant harmonics in the high frequencies. Once digital clipping occurs, that audio information is gone forever. No plugin or technique can rebuild those chopped-off peaks.
How to prevent clipping in your DAW
Proper gain staging
Gain staging is your first line of defence against clipping. It means managing the level of your audio signal at every step of the recording and mixing process. Think of it like water pressure in pipes - you want enough flow to be useful, but not so much that you blow out the system.
The golden rule I follow: aim for average levels around -18 dBFS with peaks no higher than -12 to -10 dBFS. This gives you the perfect balance - strong signal without any risk of clipping, plus plenty of headroom for processing.
Set quieter recording levels
Before you hit record, always do a test run:
- Set your interface gain while performing the loudest part of your song
- Watch the meters - keep peaks below -10 dBFS
- Leave headroom for unexpected loud moments or emotional performances
- Check your whole signal chain - microphone, preamp, interface, and DAW input
It's much easier to boost a quiet signal later than to fix clipped audio.
What about mixing and plugin gain?
Even if you record at proper levels, clipping can sneak in during mixing. Every plugin you add can change the gain:
- Check between plugins - A signal might be fine going into an EQ but clipping coming out
- Use makeup gain carefully - Compressors and limiters often boost levels
- Watch your master bus - All those tracks add up quickly
Automate at the end of the chain - This preserves your plugin settings
Use headroom to avoid clipping
What exactly is headroom in audio?
Headroom is the space between your audio's peaks and the clipping point (0 dBFS). Think of it as a safety buffer - like leaving space at the top of a glass so it doesn't overflow when you carry it. The amount of space in between the signal and the clipping point is the headroom.
For mixing, you want at least 6 dB of headroom on your master bus. This gives you room to add processing and ensures your mastering engineer (or mastering plugin) has space to work their magic. Leaving good headroom is essential as you prepare your mix for mastering.
How do you maintain proper headroom throughout production?
Managing headroom starts from the very first recording:
- Track conservatively - Those -18 dBFS average levels give you natural headroom
- Use high-pass filters - Remove unnecessary low frequencies that eat up headroom without adding anything musical
- Balance as you go - Don't wait until the end to check your master bus level
- Leave the master fader alone - Adjust individual tracks instead
Very low-frequency signals (below 60Hz or so) can easily devour headroom without actually being audible in the mix, and you'll be amazed at how much you can drop the level at the master output by rolling off the sub-bass on a kick drum or bassline.
What role does a limiter play in preventing clipping?
When to use a limiter
A limiter is like a safety net for your mix - it prevents any signal from exceeding a set threshold. Unlike clipping, which brutally chops off peaks, a limiter quickly turns down the volume when things get too loud, preserving the shape of your waveform.
I recommend using a limiter in two situations:
- On individual tracks that have unpredictable peaks (like vocals)
- On your master bus as a final safeguard
Setup correctly
Setting up a limiter properly is crucial - too aggressive and you'll squash your dynamics, too gentle and it won't protect against clipping:
- Set the ceiling to -0.1 or -0.3 dBFS - This prevents inter-sample peaks
- Use fast attack times - You want the limiter to catch peaks instantly
- Keep gain reduction minimal - If you're hitting more than 2-3 dB regularly, your levels are too hot
- Listen for pumping - Overuse creates an unnatural "breathing" effect
Remember, a limiter should be invisible when used correctly. If you can hear it working constantly, you need to go back and fix your gain staging.
What common mistakes cause clipping?
Beginners often record too hot
There's a persistent myth that recording as loud as possible gives you better quality. This comes from the analog days when you needed hot levels to stay above the noise floor. But in digital recording, staying in that average -18dB pocket is just as important in the mixing stage as it is during recording.
Common recording mistakes include:
- Setting input gain based on quiet parts instead of loud sections
- Not leaving room for emotional performances
- Watching peak meters instead of average levels
- Ignoring the gain structure of the entire signal chain
Mixing errors also cause clipping
Even experienced producers can fall into these traps:
- Plugin gain buildup - Each EQ boost or compressor adds level
- Not checking between plugins - You also need to make sure that nothing is clipping between plugins!
- Ignoring the master bus until it's too late
- Using presets without adjusting output levels
I've learned to check my levels obsessively throughout the mixing process. It only takes one plugin with too much makeup gain to ruin an otherwise perfect mix.
How can you fix clipped audio if it's already recorded?
Is it possible to repair clipped recordings?
Here's the hard truth: true repair of clipped audio is impossible. Unfortunately, clipping is one of the few processes in digital audio that's truly destructive. That means that once it occurs, there's no way back to the original signal.
Some advanced software claims to "rebuild" clipped waveforms, but these are really just sophisticated guesses at what might have been there. The results are never as good as properly recorded audio.
What are your options for salvaging clipped tracks?
If you're stuck with clipped audio, your options are limited but not hopeless:
- Re-record if possible - Always the best solution
- Use declipping software - Tools like iZotope RX can help minimize the damage
- Creative masking - Layer unclipped takes or use effects to hide the distortion
- Embrace it artistically - Sometimes distortion can work as a creative choice
When artists come to me with clipped vocals, I always push for re-recording. The time spent getting it right is always worth it compared to hours of trying to fix the unfixable.
Understanding clipping is a huge step toward professional-sounding recordings. By managing your gain properly at every stage - from recording through mixing - you'll capture the full dynamic range and emotion of your performances. Remember those key numbers: peaks around -9 to -10 dBFS, averages around -18 dBFS, and always leave yourself plenty of headroom.
The best part? Once you develop good gain staging habits, preventing clipping becomes second nature. You'll spend less time fixing problems and more time being creative with your music.
Do I need to worry about clipping on every track?
Yes, you should monitor levels on every track in your project. While some tracks are more prone to clipping than others (vocals and bass, especially), any track that clips will degrade your overall mix quality. Make gain staging a habit from the start of every project.
What's the difference between clipping and limiting?
Clipping abruptly cuts off audio peaks, destroying the waveform and creating harsh distortion. Limiting intelligently reduces gain when the signal approaches a threshold, preserving the waveform shape while preventing overload. Think of clipping as a brick wall and limiting as a cushion.
Should I use soft clipping plugins?
Soft clipping plugins can be useful creative tools for adding controlled saturation and warmth. Unlike hard digital clipping, they gradually compress peaks, creating musical harmonics. Just use them intentionally as effects, not as a band-aid for poor gain staging.
Can mastering fix clipped mixes?
No, mastering cannot fix clipping that's already baked into your mix. If you've ever sent a pre-master to a mastering engineer, you know what this is. Mastering engineers will often ask for 4dB to 6dB of headroom. Always provide clean, unclipped mixes with proper headroom for the best mastering results.
How loud should my beats be before adding vocals?
Keep your instrumental peaks around -6 to -10 dBFS before recording vocals. This leaves plenty of headroom for vocal recording and processing while maintaining a strong backing track. Remember, you can always turn things up later, but you can't undo clipping.
As a music producer and the founder of Luke Mounthill Beats, where artists come to buy beats with complete confidence, I've spent years helping artists get professional-sounding vocals, and understanding clipping is one of the biggest keys to that success. Luke Mounthill Beats offers vocal-ready, royalty-free beats and resources to help artists build professional music careers.